Before we take a deep dive into native ads, let us understand first what native ads are.
Q: Why would you want to show Native Ads?
If you are an app developer looking to monetize your app by display advertising, but want to customize ads according to your app’s look and feel, then native ads are what you should be after.
Q: What are InMobi Native Ads?
InMobi Native Ads are mobile ad units that have been adapted to an app’s appearance and behaviour, providing users with a seamless experience. For example, if the native look of a property is a tiled format, the ad will be in a tile. If the native behavior of the property is flipping tiles, the native ad tile will also flip. A native ad can also easily get blended in a table view, or any other view, so as to appear integral to your property’s UI.
Q: What are the basic steps required for integrating native ads?
First, create a mock of how the native ad should fit in your app’s user interface. I’ll be sharing my own app experience to make this process easy to understand.
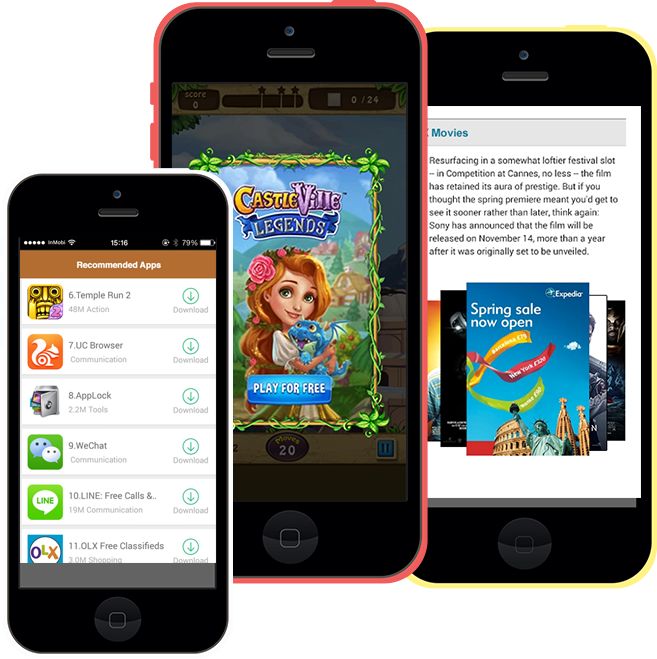
This a screenshot of my basic tic-tac-toe app.
1.jpg)
Now here it is with a standard banner at the bottom. It’s clearly distinct from the app, but it’s not always best to stand out so much - rather than attracting response, it might be seen as simply distracting from the game.
How about if the necessary stuff required to display the ad was actually provided to you, and you just stitch the assets together?
This would now give you the flexibility to adjust the background/foreground colors, the font, the position of the image assets, allowing the advert to blend neatly and attractively within the app.
Complicated? Actually, no.
If you look at any app in the app store, you will notice this information:
- App name and description
- Screenshots, icons (image assets)
- App rating
- App reviews
- Pricing
A designer might use some or all of these assets to build an ad to promote that app. But they'll be doing that generically - not with your app in mind. You could just as easily grab those assets yourself, then you can decide how the ads should fit best with the look and feel of your app.
So here’s a Native Ads 101 lesson to get started:
Option 1: Have a 320x216 image asset, and on top of it display the app title and description, giving a nice moonlight effect.
Option 2: Have a ‘tile’ like ad piece, and use the app name and description on that, together with an ‘Available on app store’ logo.
Then, instead of the ‘Available on app store’ logo, wouldn’t it be better to have a simple “Download” button?
Option 2 sounds more interesting to me… let’s have a look!

Clearly a better fit than the standard banner. But there is still some scope for improvement.
How about making the rating part of the ad?
A minor reshuffle… and... wait for it...

Even better with some tuning of the creative!
Now let’s take a look at the whole app:

Well, definitely better compared to the basic banner in the app; and it’s all made simple with InMobi’s latest SDK!
Getting started with native ads in your app
The necessary steps required to integrate native ads are as listed below:
A. Lay out a nice mock for a native ad, matching the look and feel of your user interface.
B. Integrate InMobi SDK 4xx.
C. Customize your template.
D. Stitch the assets together to display the native ad.
E. Enable Impression and Click handling.
F. Refresh Rate
G. Test and go live!
A. Lay out a mock
The mock layout is entirely up to you, but you would want to keep certain things in mind:
Since adverts are mostly app downloads, choose realistic meta information available for an app, such as:
- App title
- App rating
- App description
- App icon (ideally in the range of 57x57 - 120x120 px)
- App medium-large screenshot - ideally having aspect ratios like (1.2 - 1.6) or (0.5 - 0.7)
- A clear tag indicating this is an advert.
- Call-to-action: A post-click action, which should trigger the app download for the user.
From the above screenshot, the mock-up chosen by me looks like this:

Let me explain what each field represents here:
- Monster Galaxy - App title
- Stars - App rating
- Bottom text - App description
- App icon - 114x114 for retina display
- Sponsored - a tag showing clearly that this is an advert
- Download: the call-to-action, which triggers app download when tapped
- Now for my advert, I haven’t chosen to display a bigger image, but that might change according to your app’s UI.
B. Integrate InMobi SDK 4xx
Integrating the InMobi SDK is pretty simple, and can be done quickly!
Download the
SDK as per your development platform, and follow the integration guidelines to implement the library. I’ve used iOS as the development platform, so if everything went well with your integration, your Xcode project should look like this:

C. Customize your Native Ad template
Once you’re convinced the mock looks good, assign some Key-Value pairs, for each. This will be used in a later section, when stitching the ad metadata together!
So lets do this..
"title" : "<title of the app>"
"subtitle" : "<description of the app>"
"icon" : {"w" : <width of the image>, "h" : <height of the image>, "url":"<url of the image>"}
"landing_url" : "<landing url of the app>" (we’ll discuss this in detail )
"cta" : "Download"
Once you’ve decided the template, you’d need to pass this information to InMobi. When an InMobi Native Ad is served to you, the necessary information of an app would be present in those K-V pairs.
D. Stitch the Native Ad metadata together
In this section, you’ll have to write some code to prepare the ad according to the look and feel of your app.

If you match the template, as created in section 3 with the ad, then everything adds up quite easily:
From the ad that we want to create, as stated above:
“Monster Galaxy” -> “title” parameter in the template -> UILabel/TextView
“icon” -> ImageView
Sponsored -> UILabel/TextView
“Battle and Tame...” -> “subtitle” -> UILabel/TextView
image ratings -> “rating” -> array of ImageView
“Download” -> Call-to-Action -> Button
..
and so on!
E. Impression and Click handling
Impression and click are an interim part of display advertising. So far we’ve integrated the InMobi SDK for native ads, defined our native ad mock, and stitched the ad template together.
The code-wise heavy lifting part is finished, and now comes the metrics part.
When you login to the InMobi publisher dashboard, you would want to see certain metrics:
Impressions, clicks generated , click-through , eCPM etc.
In the case of regular Banner/Interstitial ads, it is the InMobi SDK that provides you callbacks, for crucial events like - impressions, clicks, etc.
The SDK also opens the landing page (associated with the ad) by itself.
In the case of Native Ads, the tables have turned, and it is up to you now to tell the SDK when you’re counting an impression, or a click!
PS: The steps mentioned here assume 1 Native ad in the entire application. In case your app has different screens, for which you want to customize your Native Ads differently, make sure you choose different InMobi Property IDs for each different template being created.
For each screen, you may create a different IMNative object as well, for effective memory management.
The below mentioned APIs would then have to be called specifically for each IMNative object,
IMNative1 -> displayed to the user -> impression handling -> clicked by the user -> click handling
IMNative2 -> -> displayed to the user -> impression handling -> clicked by the user -> click handling
.. and so on.
Impression counting: InMobi relies on the client-side counting mechanism, to count the number of impressions that the publisher has generated. So each time the end user sees your native ad, you have to notify the SDK that an impression has ‘rendered’.
This can be accomplished by calling the method attachToView, of your IMNative object.
The SDK would be able to track the ‘rendered impressions’ using the callback.
InMobi SDK Code to be called:
iOS: [nativeAd attachToView:UIView]
Android: nativeAd.attachToView(ViewGroup)
PS: Make sure you pass a direct child of ViewGroup in Android, i.e. RelativeLayout,FrameLayout,LinearLayout,etc.
Passing ListView instance might raise an error, and result in incorrect counting of impressions.
Click counting: Counting valid clicks on the ad is as sacrosanct as counting impressions. For banners and interstitials, the ‘click’ on the advert is generally referred when the user ‘clicks’ the advert.
What if your app has other gestures -- flip, left swipe, right swipe, shake, etc..
It gets very tricky in the case of regular display advertising to figure out such gestures for your app, and at the same time ‘blend’ itself to be one of them.
With native ads, you govern which gesture on the advert defines the click. This gives you the complete control over the native ad, and now you can proudly say that as the owner of the real estate of your app, you also now exercise total control over the ad.
InMobi SDK Code to be called:
iOS: [nativeAd handleClick:NULL]
Android: nativeAd.handleClick(null)
You have to just remember two things, as stated earlier:
- Define a gesture for the ‘click’ on the ad.
Make sure you call the handleClick method on IMNative, when the click event occurs on the advert. This would help the SDK to track clicks and optimize for better performance.
- Open landing page: Just like every event is associated with an action, in advertising, the click is associated with performing an action, mostly opening the landing page associated with the creative.
If you scroll above look at the template, we defined a parameter ‘landing_url’. This landing URL contains the URL associated with the ad. The URL could be:
So when the click event happens on the ad, after passing the handleClick message to the SDK, you would have to open the landing page associated with the ad.
Let me simplify this part, as per the OS:
IOS: If you’ve used the StoreKit framework for IAP, you would have come across this class -> SKStoreProductViewController
This class can open the iTunes product inside the app itself, so the user doesn’t have to be taken to the App Store/iTunes App, outside the context of your application.
To use this, you need to only check if the landing_url is an iTunes URL, and the product ID associated with it.
https://itunes.apple.com/in/app/monster-galaxy-zodiac-islands/id446031890?mt=8
For the above iTunes URL, the productID is "446031890"
Using NSURL concepts and string traversal, both of these can be easily identifed and processed.
If the URL is not an iTunes URL, you can simply use UIApplication’s openURL: method to open the landing URL outside the context of your app.
Android: For Android developers, you can fire an Intent.ACTION_VIEW with the Intent’s data as the URI of the landing_url.
It is also recommended to add Intent.FLAG_ACTIVITY_NEW_TASK as an additional flag.
F. Refresh rate
Refresh rate of a native ad indicates the duration after which a native ad is re-loaded, and displayed to the user.
Since with native-ad, you control the frequency at which the user can see an ad, it is also important to refresh ads continuously, to avoid ad fatigue.
Whether you’re displaying ads in a ListView, or a NewsStand like UI, make sure that ads are refreshed at a proper rate.
Too much frequent ad refresh are also not recommended, as it reduces the click-through on an ad.
It is recommended to have a refresh rate in the range of 20-60 seconds, depending on your app.
That’s the entire lifecycle of a native ad!
So that’s it folks, now your native integration is complete!
In case you are as excited as we are about using our Native Ad platform, drop us a note on iluvnativeads@inmobi.com and we’ll help you get started!